개요
기간 - 2018-05-19 ~ 2018-05-24
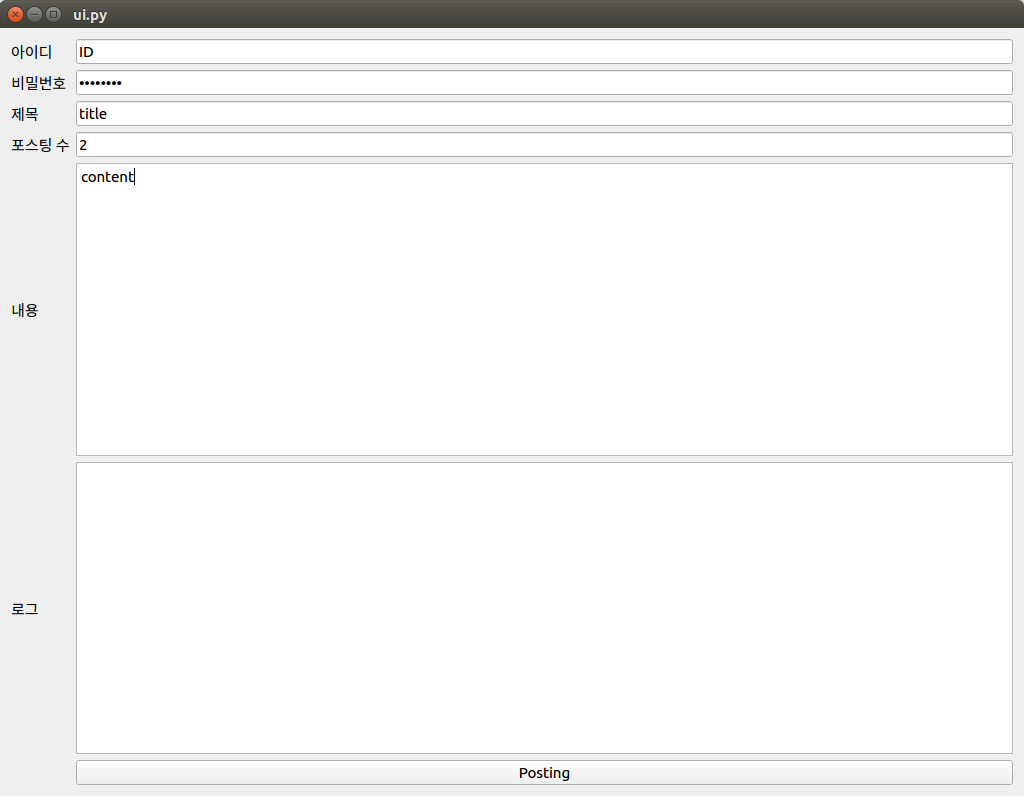
주요 기능
pyqt5를 사용하여 로그인 정보와 포스팅 제목, 횟수, 내용을 받아 해당 정보를 바탕으로
selenium을 통해 다음 블로그에 지정된 횟수 만큼 동일한 내용으로 포스팅 할 수 있다.
그리고 pyinstaller를 사용하여 window에서 실행파일 exe를 만들어 실행 가능.
github
https://github.com/himanmenGit/AutoDaumBlogPosting
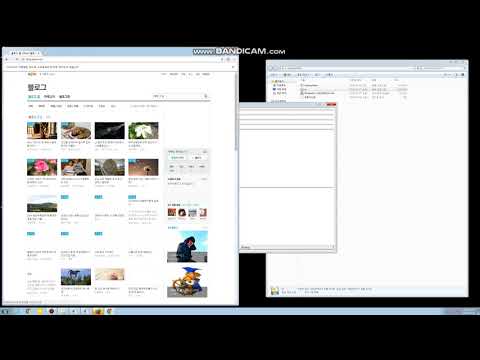
View
Youtube
설치하기
파이썬 패키지 설치
Requirements
- Python 3.6
- pyqt5 5.10
- selenium 3.12
- pyinstaller 3.3.1
- chromedriver 2.37
.exe file create
pyinstaller --onefile --windowed ui.py
윈도우에서 실행파일로 실행시 chromedirver.exe파일의 위치를 실행파일이 위치하는 곳으로 지정 해주어야 한다.
if platform.system() == 'Windows':
    current_folder = os.path.realpath(
        os.path.abspath(os.path.split(inspect.getfile(inspect.currentframe()))[0]))
    driver_path = os.path.join(current_folder, 'chromedriver.exe')
elif platform.system() == 'Linux':
    current_folder = os.path.dirname(os.path.realpath(__file__))
    driver_path = os.path.join(current_folder, 'chromedriver')
예외
-
다음 블로그의 경우 포스팅 화면에서 제목부분에서 알수 없는 이유로 인해
a.tagname.touppercase is not a function이라는 에러 발생 포스팅하는 페이지를 모바일 버전으로 접속 하여 포스팅 하게 변경. -
본인의 운영체제인
ubuntu 16.04에서exe파일로 빌드 해보려 했으나 빌드가 안됨. 그래서 윈도우로 프로젝트를 옮겨pyinstaller로 빌드 하여 성공. -
chromedirver은 2.37을 사용. 최신 버전인 2.38은 아직 지원되지 않는 듯 (5.20일 기준) -
실행파일 실행시
api-ms-win-crt-runtime ~날 경우Windows6.1-KB2999226-x64.msi파일을 설치후 재실행
참고
출처 : 정겨울님 블로그
Comments